How to secure website for free (Free SSL) with Cloudflare

Everyone must be concerned about the security of their website. So, no one should get spams on their website or someone should not be able to hack their website. It also includes the concern that nobody should continuously send fake traffic to down your website. However, you will be surprised to know that this happens and some people do it intentionally. That is why we always security checks for our website or blog. Now comes the question that how can we do it easily? The answer to this query is Cloudflare. Let’s know what Cloudflare is and how to integrate it on your website. After the complete study of this article, you will be able to secure your website for free.
Google has made a huge change in one of its algorithms “Chrome Security Warnings – 24 July 2018”. If your website does not have SSL, then your website will warn not secure on Google Chrome browser. That means the browser tells you that your website is not secure, it can be attacked anytime. Websites with HTTPS are secured with SSL. So, firstly I will explain the difference between HTTP and HTTPS.
What are HTTP and https?
The full name of HTTP is HyperText Transfer Protocol. This protocol is used by WWW (World Wide Web). HTTP is a protocol that allows the resource fetching from the server, like HTML documents. When you access a URL on your web browser, then HTTP sends a request to the web-server which opens your website. Actually, HTTP serves as a communication between client and server.
HTTPS is a new version protocol, which is much secure compared to HTTP. S in HTTPS means Secure; hence the full form of HTTPS is Hypertext Transfer Protocol Secure. It enforces the websites to open in encrypted form on the browser. This means that, when you open a website on your browser, the response that will come from the server will be completely encrypted i.e. no one else can read it. This prevents the website from getting spam and hacking.
- What is Amazon Web Services? Services provided by AWS.
- CodeIgniter Introduction, features and How it works
- What is Google Firebase? What services does it provide?
How to get a website with HTTPS? (SSL for free)
To run your website with HTTPS, you will need to install an SSL certificate on your website. There are a lot of SSL Certificate Providers present in the market. They will charge you a few bucks to a handsome amount for SSL service. And you will be charged on a yearly basis (or monthly depends on their plans) for an SSL Certificate. But here, I will talk about the Free Trick to get an SSL Certificate, which will be an easy solution too, as compared to an expensive SSL. And the name of this free service we are going to know about is Cloudflare. Though Cloudflare is a famous name, newbies are not aware of the process to get SSL from Cloudflare. Let’s get to know about the Cloudflare.
What is Cloudflare?
Cloudflare is a web service that provides you a variety of features related to the security of the website, such as DNS management, firewall, DDoS attack, bandwidth, SSL certificate, etc. Many facilities are available. Additionally, it also manages the traffic of your website, which you can see in its analytics. If your website is connected to Cloudflare then the speed of the website will be better than before.
You can also use more websites in its dashboard, meaning even if you have 100, you can manage it from one account. If you want, you can put SSL on 100 simultaneously, that too for free forever.
How does Cloudflare work?

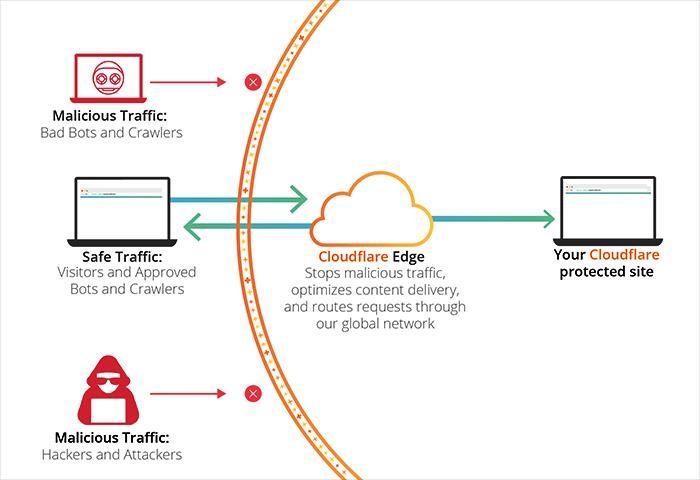
Once you set it, it acts as a layer between domain and hosting, that means whenever a user browses the website, the request will go through the first domain to Cloudflare. Cloudflare will check this request and then passes on to the hosting. If a spam request comes in between, Cloudflare stops it.
How to set up Cloudflare on your website?
Setting up Cloudflare seems to be, but is not that difficult. If you will follow the steps given below, you will be able to do it easily. For this, you should have your own domain details. Like Godaddy’s account details or any other hosting provider where you have registered your domain.
Step #1: Signup or login to Cloudflare.com
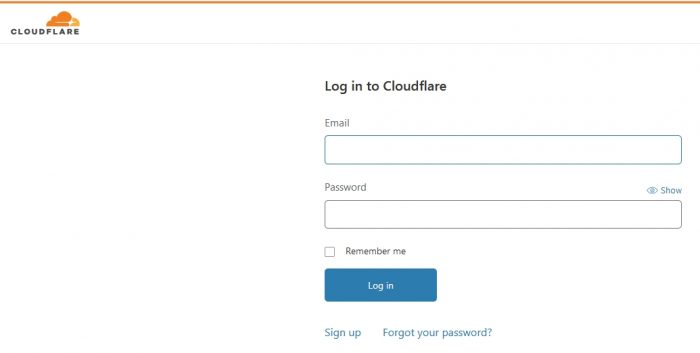
First of all, you have to create an account on Cloudflare.com. You can create that by clicking on Sign Up. Where you will just ask for your email id and password. You can log-in to your account once you will be successfully registered.
Step #2: Enter in your account
As soon as you will enter in your account, you will need to enter your website. If you log-in in your account for the second time, then click on the + Add Site menu, you will see a box to add the website.
Step #3: Add your website
Enter your website URL in the textbox and click on the Add Site button.
Step #4: Check information and Proceed
In this step, you will see a popup which will be for information only. Next, move ahead.
- Detect A Page Refresh Or New Page Entered In PHP
- How to dynamically call methods in PHP
- Close Div By Close Button Click Or Body Click By JQuery
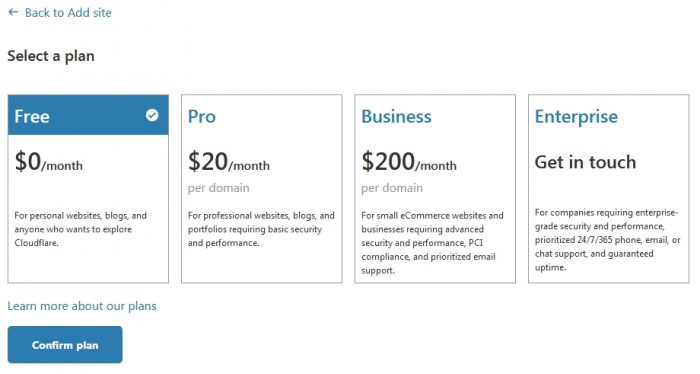
Step #5: Pick Free Plan to get Free SSL by Cloudflare
Here you will ask about the plan to choose, select the free section and click on the “confirm plan” button below and proceed.

Step #6: Add DNS record in Cloudflare
In this step, Cloudflare displays your present DNS record. This is the same record that will be in your Godaddy account. Here you will need to enter an A record. Enter www in the Name box, your website IP (like 103.225.26.23) in IPv4 address box and click on Add Record button. Afterward, you will see a record Named www in the table like in the below image.

Step #7: Update nameservers in domain registrar account
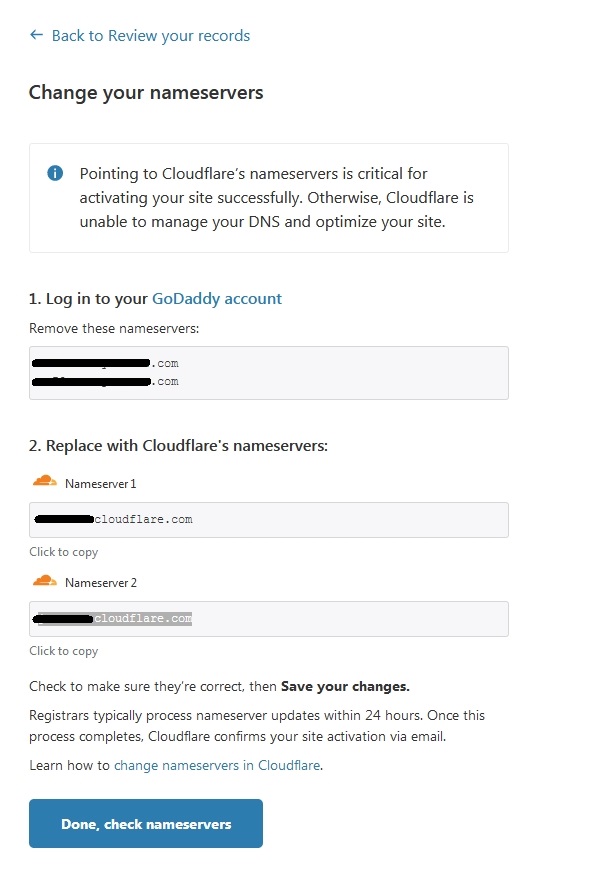
In this step, Cloudflare will ask you to change your nameservers in your domain registrar account (Godaddy in my case). It will give two new nameservers and you will have to go to your Godaddy account’s DNS manager and change it. Keep in mind that the nameservers on Godaddy will have to be replaced with new nameservers given by Cloudflare.

After this, you will have to wait for a few minutes to get your website connected to Cloudflare. Then you need to wait for a bit because Cloudflare takes more than 48 hours to change the nameservers. However, it does it in lesser time than that. You will see Universal SSL Status active as soon as it will get approved.
- Triangular Star Pattern Programmes With Examples
- Half Border Design And Fixed Width Border Design In CSS
- How To Change Phone Number In Gmail Or Google Account
In Cloudflare’s settings, you don’t need to do much, you just have to turn on Always Use HTTPS in the Crypto tab, and in Auto Minify in the Speed tab, check all three JavaScript, CSS, HTML to minify all the files as it will reduce page load time. This will overall improve the speed of your website.
You can visit Cloudflare’s official website to get free SSL to your website.
So, if you understood how to set-up SSL on your website by Cloudflare, then you need not worry about the security of your website anymore. Nor do you have to spend any kind of money on it. I hope this post will help you a lot. I would like you to share it with other people as well. If you want, you can send this post to your web development team and tell them about this benefit. Apart from this, if you are facing any problem in setup, then please comment below, I will try to solve it.


Leave a Reply